
Velody is a Heathen crafter who blogs at Treegold & Beegold. She is married to an eclectic pagan and has 2 young children that are being brought up with a bit of both traditions.
Whether you celebrate Samhain or Winter’s Night this time of year about remembering where we came from and those who have passed away. Once my oldest, Lil’ R turned 3 I’ve been trying to do crafts regularly with him and think that crafts are a great way to introduce him to our faith. Since we have zero seasonal altar cloths in this house I thought this would be a great time for us to make an Ancestor Altar Cloth.
Materials:
18” x 27” piece of white fabric
Pack of sponges
Acrylic Paint, assorted colors
Scissors
Marker
Notes:
Those are the dimensions of the piece I cut but they can be modified for your purposes.
I hemmed my piece of fabric myself but if you are not able to sew it you could purchase a white placemat, table cloth or other already made piece of white fabric.
I happen to have a lot of acrylic paint in the house but if you wanted to make sure you could wash this then use fabric paint.
Instructions:
Hemming the Cloth
This first part if for hemming the cloth. If you are using an already finished piece then please skip this section.
This is to hem the fabric while creating mitered corners.
Fold fabric over 3/4” and press in place.
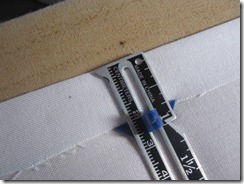
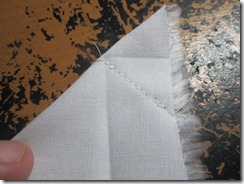
Once all 4 sides are pressed fold over each corner and press. Notice how the creases line up?
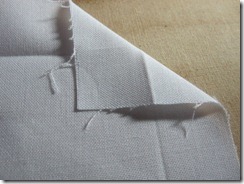
Fold the fabric to make a triangle of the corner and stitch along this last crease you just made.
This is what it will look like after it is sewn.
Snip off the excess fabric beyond the stitching.
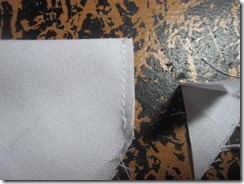
Turn the corner so that the right side is out and along the original creases. Voila, you have a mitered corner.

Repeat steps 2-6 for the remaining 3 corners.
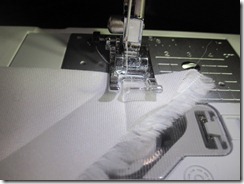
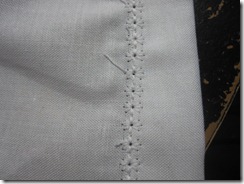
Now to complete the hemming stitch along the exposed edge. I used a decorative stitch but a zig-zag stitch would suffice. This picture shows the wrong side of the fabric. See how the stitch covers most of the exposed edge?
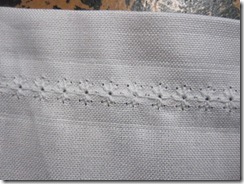
Here is the right side of the fabric.
Decorating the Cloth
I picked up a pack of 10 sponges at Dollar Tree for $1 and that is what I used to do this part.
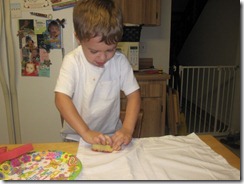
Take the sponges and draw a few different leaves on them. If you need some help see the leaf images I put on the Mabon Thanksgiving Wreath Post. Cut out your shapes.
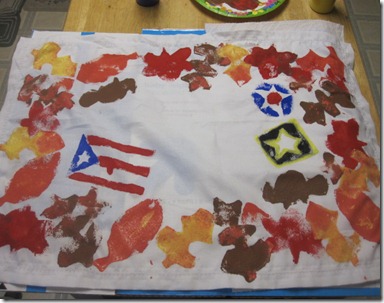
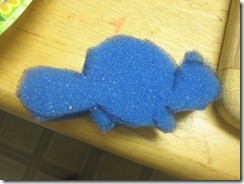
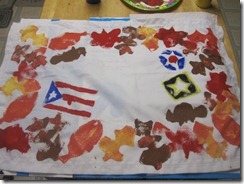
Think of a few simple images that represent your family and it’s heritage. We did a Puerto Rican flag for my Husbands side, the Army Star because many in his side (including himself) also served in the Army, a beaver to represent Canada for my mother’s side and the symbol for the Army Air Core that my great-grandfather on my dad’s side was a Colonel in.
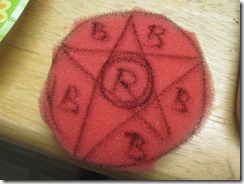
This is the Army Air Core symbol. I marked which colors go where. Symbols like this I applied the paint with a brush.
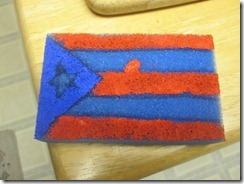
The Puerto Rican flag with the paint applied. (The sponge was blue so it’s a bit tough to see the blue paint)
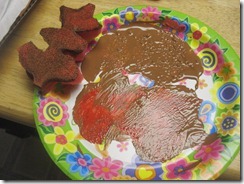
For the leaves I filled a paper plate with paint so could just dip the sponge directly into the paint.
Now press your sponges onto the fabric. Make sure to put something under the fabric such as paper towels or cardboard.

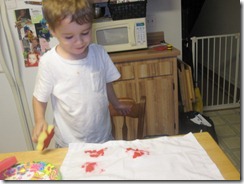
Put the sponge on the fabric and press evenly all over to ensure that it stamps the full image. Lil’ R didn’t do that so he needed help.
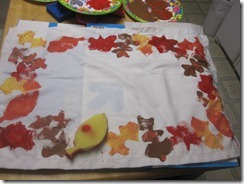
Keep adding stamps, overlapping the leaves if you want and filling as much space as you desire. This is a very personal project so do what ever you and your family would like. Finally it will be complete and just put it somewhere to dry fully.
I hope you enjoyed this project and if so please leave a comment letting us know what personal symbols you chose for your family. Please follow my blog or subscribe for future tutorials.
Also don’t forget the Halloween Bow Giveaway contest that is going on until the 17th. There is still plenty of time to enter.
-Velody
No comments:
Post a Comment